Wifi Reversing Camera Any Good on a Motorhome?
The first time I reversed our motorhome I noticed there was something missing – a reversing camera. Although the mirrors are great and you can see almost everything there is a bit of a blind, over two meters, spot directly behind the motorhome. That is where the reversing camera comes in and lets you see directly behind you.
To answer the question though,
A wifi reversing camera is adequate for the job. However, if you want better quality and reliability then go for the full wired type. They are a bit more difficult to fit but you will find the picture on the screen to be consistently clearer.
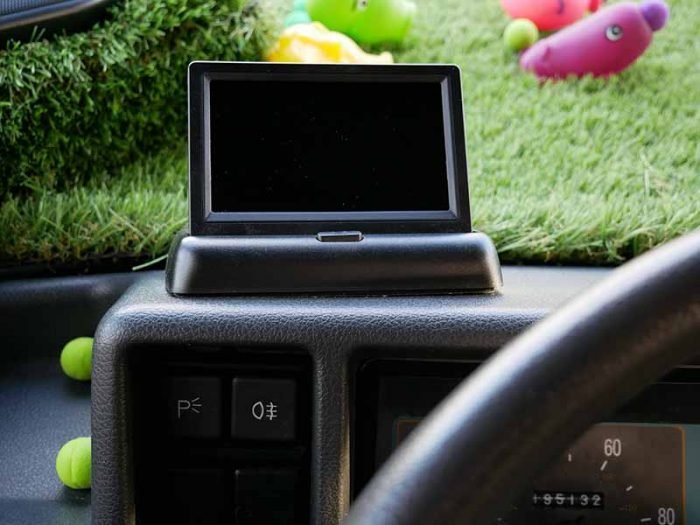
The reversing camera we chose was the Podofo® 4.3″ Foldable Wireless Car TFT LCD Mirror Monitor with Waterproof Night Vision Parking Reversing Camera Kit. This camera is quite a cheap option but has worked very well for us both in the daylight and at night, Easy to put in and reliable, so far.
Why Do You Need a Reversing Camera?
I hadn’t thought about it before I started driving the motorhome but when reversing there is a great big blind spot right behind you. I am used to driving vans but our motorhome is a bit longer and wider so the blind spot is substantial.
The clincher though was when I was reversing into my driveway and a pedestrian walked right behind the motorhome as it was moving into the drive. Luckily I had been keeping an eye on this person and caught a glimpse of them disappearing behind the motorhome as I was going in, They were actually running to get past rather than wait 5 seconds for the motorhome to go into the drive, Crazy.
Reversing camera ordered.
Why Choose a Wireless Reversing Camera?
I wanted a camera that was easy to fit. I was not sure how reliable a reversing camera is or how much work they are to fit. I wanted something I could fit quickly and if required do the research to find a more permanent solution.
The wireless solution seemed like the best option for the ease of fit and the speed I could have it up and running.
I was not very keen to drill any more holes in the motorhome. There are quite a few already built up over the long life of the motorhome. If this camera was going to be a temporary option then I did not want another hole in the bodywork.
Holes, no matter how careful you are, are always prone to leaking, I try and keep them to a minimum.
The Difference Between Wired and Wireless
The wireless cameras have a transmitter at the camera and a receiver at the screen on the dash. You don’t have to connect the screen to the camera so you don’t need a wire routed right through the motorhome.
As the picture is being transmitted there can be problems with interference, the distance from the transmitter and the receiver can be an issue as well as the electrical equipment between both units.
The wired type does tend to have better picture quality and less interference but surprisingly I have not found this to be much of an issue with the wireless camera. There have been occasions of a few flickering lines but I am still able to see.
Quality Of The Build
The quality of the camera we chose for the motorhome seems quite good. The camera is designed to be put at the top of a number plate or somewhere similar with handy attachments.
The camera seems to be well sealed and sturdy.
The screen is about four inch and seems big enough. There are clearer and larger screens but for the money, this is quite good.
I wanted to have the camera on the top of the rear locker door where the gap between the door brush seal is letting a cable through nicely.
I have checked for any leaks and the locker door is nice and dry.
The distance between the display and the transmitter is about 5.5m. The picture quality is consistently good. There have only been a couple of occasions where the display has lines on the screen but you can still see what is going on.
The folding screen is a bit flimsy and naff. I just leave the screen up all the time as the button to release the screen is unreliable and I am worried it won’t pop up when required.
How Has it Been to Use?
On the whole, the camera has been really good. The difference it makes having the camera fitted is huge. The screen display is great and once I worked to get the connections clean and soldered, the display was more reliable. Not that it was terrible in the first place.
The camera has a good wide viewing angle and it becomes very easy to judge how far away from things you are. In the dark, you can still see very well.
The only thing I would change, now with hindsight, is the positioning. Having the camera up high, looking down would give a better perspective and be a lot easier to judge distance. That will be why most modern motorhomes have them up high. It’s not a major problem and I am not tempted to change it at the moment.
How to fit the camera
The camera is relatively easy to fit.
I have actually just glued the camera on to the bodywork (using mighty grab adhesive, you can find it here at 1.20 in the contents) of the motorhome so it’s not even screwed on. I wanted to put the camera on the locker door at the rear to avoid putting holes in the bodywork for the cables. I routed the cable through the door seal. I was worried about water getting in but the brush seal seems to be working well and there is no sign of water in the rear locker.
Once I had decided on the route the camera cable would take I had to get the camera to some power. The power you need has to come from the reversing light, That way when the light comes on there will be power to the camera and the rest of the time when you are not reversing the camera will be off.
At the rear of the motorhome, the reversing lights are covered by a metal plate, There is plenty of room in there for connecting up your camera and in mines, managed to fit the transmitter to the roof of the locker – don’t put it behind the metal plate as the transmission will be affected.
The most difficult part is connecting the wire for the receiver to the reversing switch at the front on the gearbox,
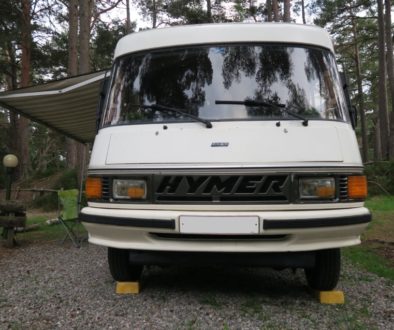
The first thing to do is identify the gearbox. In order to get access to the switch in a Hymer, you have to be a contortionist. Take out the spare wheel, disconnect the air filter and then you will be able to see a small switch that sits on the top of the gearbox. There are two connectors. When the ignition is on and the gearbox is in neutral one of the connectors will have 12volts the other should read 0volts. You want to connect the receiver cable to the 0volt side as this will have 12 volts when put into reverse.
Once you have connected the cable to the reversing switch just connect the relevant cables to the screen from the receiver and if all ok there should be power to the screen when reverse is selected. Even better you should have a picture on the display.
Try and avoid what I did and connect the receiver to the camera and the transmitter to the screen! Unsurprisingly this does not work. The transmitter and receiver units are very poorly marked and look very similar. I was following the instructions meticulously and still got it wrong. Though, in my defence, the instructions were very unclear.
Once fitted correctly the camera was working but not very well. I had to really get a good connection to the gearbox switch as the bad connection was causing a lot of interference. A small solder joint in the most uncomfortable and ridiculous position and all was good. The quality was surprisingly good. So much so that I am still using the camera with no intention to change it – unless it breaks.
For the amount of money, this is a very cheap camera. It works really well for us.
If you want a serious camera that can offer you rear vision while driving then you will want to spend a bit more money. If you just want to get into a parking space this, for us, is ample.


May 11, 2020 @ 23:39
My camera has been fitted for about two years now..high up on the rear and shows you to within inches of contact however trees can easily be missed. It had a good picture when first fitted though the lens needed cleaning frequently as cobwebs and dust are persistant but I find the picture quality has dropped right off lately and I am wondering what the cause is. Any ideas?
May 14, 2020 @ 19:00
Hi Terry. Could there be some water ingress? If the lens is steaming up this would cause a drop off in the quality of the image.
May 14, 2020 @ 19:51
Yes it could be. I will have to check it out. Thank for your mail.
April 24, 2022 @ 15:30
I fitted a single din radio which included a wired camera and all wiring. By taking the feed for the camera from the reversing light fitting itself you avoid the need to start getting down and dirty with the gearbox. The video feed wire also incorporates a trigger wire which connects to the back of the radio. Around £60 on AMZN. Great job also see u tube
April 24, 2022 @ 15:50
Brilliant idea. Might use this idea when it needs replaced. Still works great but find the screen is a little small so might replace.