Soundproofing a Motorhome. Reduce Internal Noise
Soundproofing your motorhome is an excellent way to make long drives more bearable. The engine noise can be extreme, especially in a classic older motorhome but there is a fix and it doesn’t have to be expensive.
Why Soundproof a Motorhome?
Why would you even want to add soundproofing? If you are searching this you already know. Engine noise in a motorhome, especially an old A class can be very noisy. Noise seems to be higher in older motorhomes but even in newer motorhomes, that noise could be reduced.
Now, some people like to hear the noise of the engine so that the slightest change in tone will let them know if there is something wrong. That is not really going to be a problem, you will always be able to hear the engine but you just want the decibels down enough so you don’t get permanent ear damage going on holiday.
When we first got our motorhome the noise level of the engine was incredibly high. I just thought that was normal. With our motorhome, we were dealing with 27-year-old technology. When this motorhome was made no one had even heard of the internet. That’s how far back we are going.
After a little investigation, I found that the dashboard, which is made of plywood, was completely rotten. About 25% of the dash didn’t exist anymore. It was covered in a dirty carpet, glued on to what was left of the ply dash which is why a never really noticed all the rot.
When the dash was ripped out – more like fell out, I noticed there were traces of foamy stuff on the dash that has completely disintegrated. This got me thinking that there should be some sort of soundproofing in there. After a bit of research found that the engine bay can be soundproofed.
Once the new dash was cut and prepared I found the best heat resistant soundproofing that a lot of people used on their motorhomes and fitted to the underside of the dashboard.
What a difference! We can have a conversation in the front and not have to scream at each other and our ears are a little more relaxed. Even at that, I think I could get it even quieter.
This blog will concentrate on getting the engine noise down. The rest of the motorhome is well insulated and we don’t feel we need to make the soundproofing any better. The main point of noise for us is definitely the engine noise.
How do you Soundproof a Motorhome?
We have an A class motorhome so the engine is literally in the living space. It doesn’t have a bonnet as such as the C class or a lot of B classes. So, for us, engine noise is the most prevalent rather than road noise. We can’t even hear if road noise is a problem yet.
The areas we concentrated on were the engine bay, the firewall and the footwell areas. Basically the area between you and where the engine is. This is the area should be targeted for soundproofing.
The cab area is not particularly large but it is incredibly difficult to get into with the seats and the dashboard in the way. Some people like to remove the front seats to make working in the front area a bit easier. I prefer to make things incredibly difficult for me. By the time I realised that removing the front seats was probably a good idea there was no point as I was nearly finished.
What Type of Soundproofing is Best?
This is not as simple as it may first appear. There are many types of acoustic materials that can be used in a motorhome. Some of the materials look amazing. They look like there is no way sound could pass through but the thicker the material the heavier it gets and some of them weigh a lot.
There are many different types, the best ones have multiple layers which will quieten down most noise but these can be very heavy and expensive. I was looking for something that could be done at reasonable cost and we managed to put sound deadening in the front cab and engine bay for under £100. Any more expensive than this and I would just get the family some ear plugs.
I also wanted to keep the weight down as much as possible. We do not have a huge payload so a bit of permanent extra weight can make a big difference to us. There is also moisture to consider. If you do a lot of camping in the colder months there may be a lot of condensation. You don’t want your soundproofing to be a damp store – this could cause more problems than it solves. So you want something that will resist water.
Eventually, I went for an acoustic foam, closed cell type. Just to explain – open cell is cheaper but will absorb water a bit like a sponge. That’s why I went for the closed cell type as it will resist water more, though tends to be dense and more expensive.
The closed cell type is not completely waterproof so will absorb some water, at least that is what mines has done. Our insulation was getting exposed to large amounts of water(unknown to me) and after about a year started soaking the water up.
Acoustic absorption foams (especially the closed cell type) tend to be quite dense and with that comes weight. You have to choose between noise reduction and weight in a motorhome, the heavier the soundproofing the less of your own stuff you will be able to take with you on your trips. Nothing is ever straightforward.
Obviously, if you have a large payload you can get really thick foam but it will be heavy, so always check the weight.
We researched a foam which we were very happy with – its quite thin but works well for us. It makes a big difference but is very light.
Amazon – https://amzn.to/2Lu9wHB
I ordered 5m to see how it would go and seemed to be plenty for what I required. This material seemed to have good resistance to heat and won’t break down very easily when it’s exposed to quite high temperatures. I didn’t want something that might melt if the engine gets a bit hot. It also has a reflective surface which will reflect the heat back to the engine but should also help to keep the actual rubber soundproofing contained if it ever decides to disintegrate like the previous soundproofing.
How I Used the Soundproofing
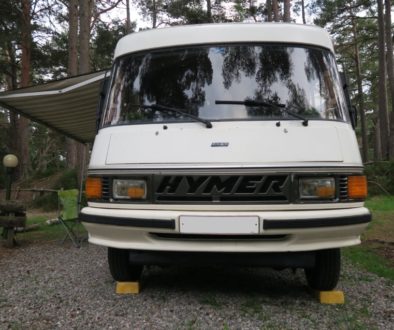
I put on two layers of this insulation on the underside of the dash. As the dashboard on the Hymer is an unusual shape it takes a bit of cutting to get the soundproofing to the correct shape.
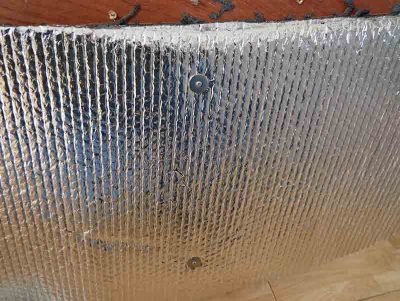
I cut one full piece and used all the offcuts of that piece as the first layer, filling up all the space on the underside of the dash. I then used the large single piece to go over the top of all the bits, giving two layers and very little waste. If you are soundproofing a Hymer remember to leave some space for screwing the dash back in, at least 25mm all round.
All the pieces were attached to the dashboard with the self-adhesive backing but I also put in some stainless screws with stainless penny washers at regular spacings (about every 6 inches, 150 mm) in order to hold it in position. It may get quite hot in there and being stuck to the underneath of the dash the sticky back will probably fail quite quickly. Hence the need for the screws. It’s been on for a while now and it hasn’t moved so happy with the result.
Now, my dashboard was out and was very easy to work on and it still took me a while to put on all the parts and complete. If you are fitting with the dash in place you will need to take your time, if you can’t get access to screw it in place, I would use a good quality glue, probably a contact adhesive as well as the sticky backing that comes with the soundproofing. This means if the adhesive backing fails, the glue should help keep it in place but a mechanical fixing is best.
Staples would also work on this thinner material but they will crush the soundproofing – not sure what effect that would have but that’s why I used screws.
Soundproofing materials are not cheap so you want to waste as little as possible. That’s why once I had cut out the shape I used the offcuts for the first layer and the good cut for the exposed layer. You want to use it as efficiently as possible so take your time and plan exactly how you can use the soundproofing well.
The dash was then fitted back into place and any gaps I filled with a silicone sealant.
Once the dash was covered, fitted and sealed around all the edges the difference was amazing. Our ears were so relieved, it almost made the journeys pleasant.
After a while, though, we soon got used to the new sound level and I quickly came to the conclusion we could do more. One idea was to soundproof the firewall.
Soundproofing the Motorhome Fire Wall
In the engine bay of every vehicle, there is something called a firewall. It is designed to keep the vehicle occupants from fire if there is some catastrophic event in the engine bay. The firewall has very little going through it and the holes are kept to a minimum. This is the area that I will tackle next.
The firewall is just a thin piece of metal and, in our motorhome, is best insulated from the engine bay. The only problem with that is that the engine bay is usually filthy and if it’s anything like ours it will be covered in oil. This will make it difficult to stick the soundproofing onto the firewall. You don’t just want the soundproofing on the firewall although that is a good start, you want it on every surface between the cab and the engine bay with the fewest gaps possible.
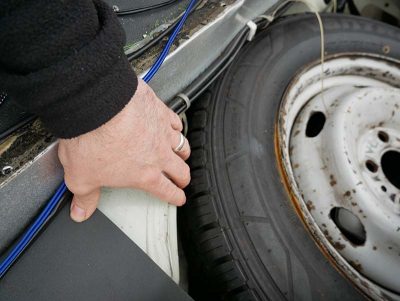
For the engine bay, I cleaned it up using sponges with a strong soap and degreaser. I used Gunk which seems to get the stubborn stuff off the engine. It’s well worth a look. I used the spray on type just for speed. A couple of applications and we were ready for the soundproofing to go on.
I just used the leftover soundproofing I had from the dash and some of these soundproofing sheets from Amazon – https://amzn.to/2WikSnV
Once you get that firewall spotless you can start to measure out how much soundproofing you will need to cover all the exposed parts. Cut them out and stick on to the firewall. Before you peel off the adhesive backing I put a few blobs of this mighty strength adhesive on for good measure. It is one of the best adhesives that comes from a tube. It’s amazing I have, to date, never had a problem with this sticking anything and will help to hold your soundproofing on if there is still some oil residue that you might have missed.
Once the firewall was covered with as few gaps as possible there are some more areas that can be covered.
In the Hymer, you need to pay attention to where the spare wheel sits as that is just a thin layer of steel between the cab and the engine bay. This is a good part to cover with some soundproofing. Just be careful when taking the spare wheel in or out of the engine bay as the soundproofing will get damaged.
Soundproofing on the Inside of the Motorhome Firewall
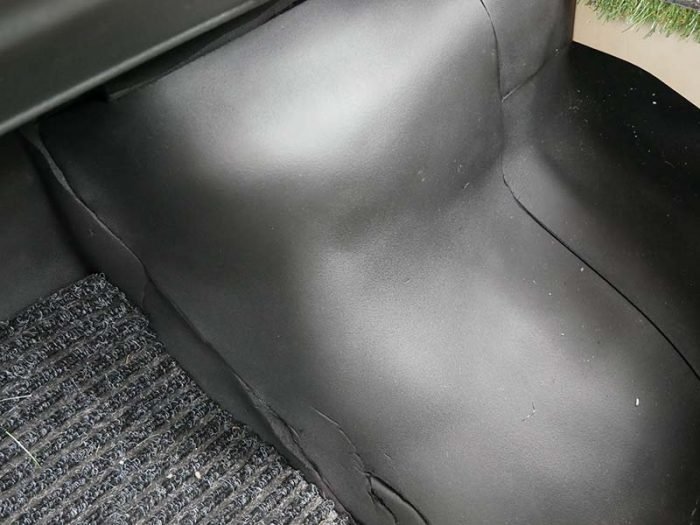
The inside is a little different in that the soundproofing material really shouldn’t be exposed to water so there are other types of soundproofing that can be used in areas like the footwells. We don’t really have a footwell as such but there is a rubber floor covering that runs up and onto the firewall.
Under this is a great spot for a little more soundproofing So, I purchased this soundproofing: https://amzn.to/2WikSnV
It’s a closed cell foam about 10mm thick. The adhesive is very strong and when you are trying to fit in tight spaces the adhesive is also forgiving if you catch it quickly enough.
I have fixed this over some very awkward shapes and it seems to be holding well.
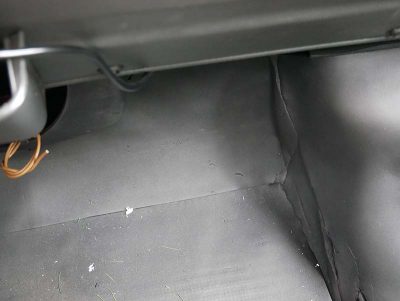
I stuck this to what looks like the original rubber flooring to deaden the sound. I didn’t remove this as it is moulded to the shape of the floor and seemed stable enough to stick the new soundproofing on to. Then with the remainder, I put some soundproofing in every space I could. I wanted as much soundproofing between the engine and the habitation area as I could fit in.
It is not an easy job and you have to manipulate yourself in between chairs and under the dash. A few years of doing Yoga would probably help but I don’t have that experience so there was only pain.
Other Areas to Soundproof
One of the areas we missed the first time around was, believe it or not, the top of the dashboard. For some reason I didn’t think we would need the dash soundproofed on the top – it seemed like a waste. Not long after though I regretted that decision.
The second time around I used what was left of my original purchase – the 5m length, to complete the soundproofing at the top.
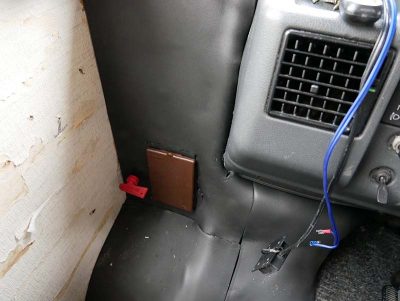
As the class A Hymer is wider than the base vehicle there are two panels at the side of the original dashboard. These areas are made from fibreglass and its not particularly thick so it’s a good idea to soundproof these areas as well. The habitation fuse box lives in one of these and can be tricky to get the soundproofing on. Go slow and take your time it will be worth it. I avoided covering the electrics or cables with soundproofing, I don’t fancy getting the soundproofing off if there are any electrical repairs needed in the future.
Some people say they like to be able to hear the noise the engine makes so that faults can be heard and quickly fixed so are reluctant to put so much soundproofing in.
In our case, without the extra soundproofing, we would all be deaf before any fault would be heard. It makes travelling so much more pleasant and I would definitely recommend doing this in any older motorhome.
As with all these blogs I am but a beginner. If you have any better ideas or have done something else that worked really well please feel free to leave a comment to help me and any future readers.

